順番は逆になってしまいましたが、8pinoへのハンダ付けとアナログ入力のテストの記録です。
I soldered pins for the 8pino.
And, I experimented on the 8pino analog input.
1.ハンダ付け Soldering
まずは、ピンヘッダーのハンダ付け。
手元にダブルのピンヘッダーしかなかったので、ピンヘッダーを1列ずつ切り取り、横に並べて使う事にしました。
A method to solder pins to the 8pino.
I have only double lines of pins.
I cut it and arranged it to one line.
ブレッドボードに並べます。
I attached it to a breadboard.
8pinoを乗せて、この状態でハンダ付けをします。
I soldered it after I attached the 8pino.
出来上がり。
Finish.
2.ブレッドボードに取り付け Wirering.
ブレッドボードに8pinoと可変抵抗器を取り付けます。
念のために、心配な人は可変抵抗器の前に抵抗を入れておきます。
I attached the 8pino and variable register to a breadboard.
3.スケッチ Sketch and run.
Lチカスケッチを改造します。
アナログ入力を使う時は、pinmodeはデフォルトのままにしておくのがArduino流のようです。
Prease remodel the LED-Blinking program.
As for the pin mode, analog input is possible as a default what Arduino style.
// Lチカ2 Brinking the LED 2
// ボリュームに応じてLチカのタイミングを変える。 Change timing for brinking LED with analog volume.
int led = 1; // On board LED (pin 1)
int vol = 1; // Analog input 1(pin 2)
int vol_num; // Analog value
void setup() {
pinMode(led, OUTPUT);
//pinMode(vol, INPUT); //Default pin mode is analog input.
}
void loop() {
vol_num = analogRead(vol); //Read analog data (0 to 1024)
digitalWrite(led, HIGH); // turn the LED on
delay(vol_num); // wait
digitalWrite(led, LOW); // turn the LED off
delay(vol_num); // wait
}
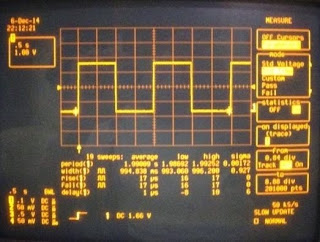
ボリューム最大値 = 1.9sec
Maximum voltage. The period time is 1.9sec.
ボリューム最小値 = 251.2us
Minimum voltage. The period time is 251.2usec.
| Evernote はあなたがすべてを記憶し、手間をかけずに整理できるようにお手伝いします。Evernote をダウンロードする |


0 件のコメント:
コメントを投稿
コメントをどうぞ