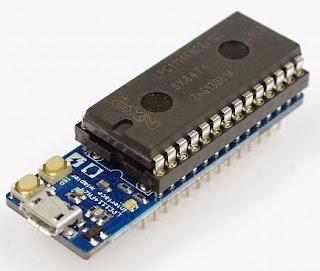
LPC810とは、NXPのとても小さな8pinARMプロセッサです。以前、トラ技の付録にもなりました。
これをmbedで使ってみます。
LPC810 is very small ARM processor.
I did mbed programing using this.
1.Intorduction
こちらのサイトがとても参考になります。パッチもここからインポートさせて頂きました。
I referred to the following sites. This is very good sites.
2.Procedure
1.Material
LPC810にプログラムを書き込むには、シリアル書き込みする必要がありますので、特別な材料が必要となります。
Serial programing is necessary to program LPC810. Please prepare the following things.
1)USB-シリアルアダプタ USB-Serial adaptor.
It is adaptor which convert a USB signal to TTL serial. I use a TTL-232R-3V3-WE
2)書き込みソフト Writing software.
FlashMagicという個人利用ならば無償のソフトを使います。
アプリケーションフォルダに移動しておきます。
I use a FlashMagic that free ware.
Unzip this program and move it to APPLICATION folder.
3)バイナリ変換ソフト Binary convert software.
mbedで作られるバイナリはbin形式ですが、このままでは書き込みが出来ません。
terminalを立ち上げ、そのフォルダに移動後、makeとするとコンパイルされてbin2hexが出来上がります。
The object made in MBED has only BIN format.
Therefore you must download conversion software from
and unzip it.
Run the TERMINAL. Move to it folder. Please type "make" that make a "bin2hex".
2.mbedでプログラム作成 Compile program use mbed.
このページからプログラムをインポートして、LPC-800MAXをプラットフォームに追加します。
コンパイルすると、LPC810_helloworld_lpc812.bin が出来上がりますので、bin2hexのフォルダにコピーします。
Import it program and add platform "LPC-800MAX".
When you compile it, "LPC810_helloworld_lpc812.bin" is completed.
3.hexフォーマットへの変換 Conversion to HEX format.
./bin2hex LPC810_helloworld_lpc812.bin LPC810_helloworld_lpc812.hex
と打ち込んで、hexファイルを作ります。
When you type "./bin2hex LPC810_helloworld_lpc812.bin LPC810_helloworld_lpc812.hex"
in console,the hex file is completed.
4.シリアルアダプタとLPC810との接続 Connection serial adaptor to LPC810
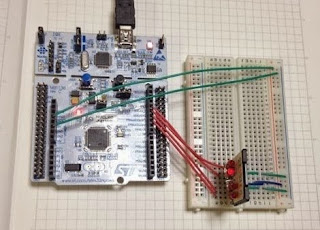
以下の様に接続します。
The method of connection, please see the following photograph.
5.ISPモードでの立ち上げ Wake up in the ISP mode.
LPC810は、5番ピンがLoの時にリセットが掛かると、ISPモードで立ち上がり、シリアルポートから
プログラムを読み込みます。
1)リセットボタンを押しながら、TTL-232RをUSBポートに差し込みます。
2)リセットボタンを離します。
これで、LPC810はISPモードになっているはずです。
The LPC810 wake up in the ISP mode when No.5 pin is Lo and Reset.
The ISP mode is reading firmware into serial port.
The methods are follows.
1)You must press reset button when you connect USB port.
2)You release reset button.
6.COMポートの確認 Confirm the COM port.
接続されたUSBの仮想ポート番号を調べます。Macの場合は、コンソールで以下の様にして調べます。
私の場合、COM9と表示されました。
ls -l /Applications/FlashMagic.app/Contents/Resources/dosdevices/COM* | grep tty.*FTH
Confirm the COM port. When you use Mac,Run the TREMINAL and type following.
ls -l /Applications/FlashMagic.app/Contents/Resources/dosdevices/COM* | grep tty.*FTH
7.FlashMagicで書き込み Write program use FlashMagic.
以下の様にセッティングしてから、Startを押します。下の表示がFinishedに変われば成功です。
You push START button after setting is as follows.
It is completion if displayed with "Finished".
8.実行 RUN
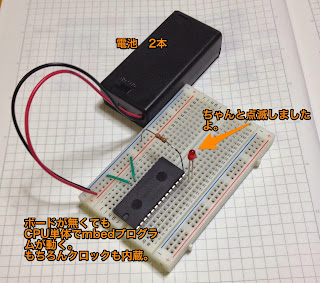
書き込んだLPC810を取り外し、別のブレッドボードに差し込みます。
6 3V
7 0V
8 LED — 470Ω — 0V
と繋いで、LEDが点滅すれば成功です!
Please insert LPC810 in a other breadboard, and wiring.
No.6 to 3V
No.7 to 0V
No.8 to LED with register(about 470ohm) to 0V
If LED is flash, your project is a great success!


